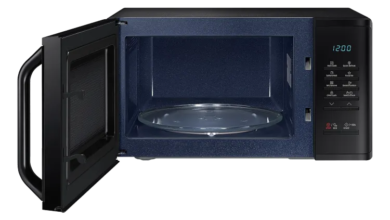
Easiest Way to Clean Your Microwave Oven
Methods for both internal & external cleaning!
Every modern kitchen now has a microwave oven as an essential appliance فاthat facilitates many cooking tasks and has various pros. We use it in defrosting food, reheating meals, preparing simple quick recipes, and baking. It is very helpful in saving effort and time on everyday usage.
But through repeated usage cycles, you will find undesirable odors in addition to greasy, splatters, and food residue. This means that it is time at which you should clean your microwave to restore its sparkling condition which is necessary for its maintenance.
So, here are some tips you can follow to get your microwave oven cleaned.
Important Tips before Cleaning Your Microwave
- Unplug or turn off your microwave while cleaning it internally and externally as long as you don’t need heat in some steps of the cleaning process.
- Be aware not to let any liquid reach the interior or vents of the microwave.
- Check your microwave oven instructions book before taking its turntable out for cleaning, usually, this is safe, but make sure to dry it properly before you return it. It is necessary to check it generally before using and cleaning it.
- Remember to clean the ceiling of the inside of your microwave, the internal side of the microwave door, and beneath your microwave. It is often easy to forget to clean these areas.
- Take care not to burn your skin with the hot bowls or high temperature of your microwave that we will use during cleaning in most of the following steps. Wait until the temperature is affordable.
Follow the Steps below to Clean Your Microwave Oven
Internal Cleaning Methods
Step 1: Mix some liquid dish soap with water in a microwave-friendly bowl.
- Put the bowl into your microwave.
- Run your microwave for 1 minute.
- Take out the bowl and with a sponge, wipe inside the microwave oven.
- Dry the inside with a dry towel.
Step 2: Fill a safe bowl with 1 cup of vinegar (vinegar can remove undesirable smells and stains) and 1 cup of water.
- Put the bowl into your microwave and add to it a wooden spoon or skewer.
- Turn your microwave oven on for 2-4 minutes.
- Turn off your microwave power, but let its door close for some minutes to soften the sticky food residue.
- Open and take out the bowl then wipe it with a clean cloth.
Step 3: Combine baking soda and water till they make a paste and put it on any hardened, burnt, or stuck food.
- Let it be for 5 minutes.
- Wipe with a wet towel or sponge.
- You can repeat until the result is satisfying.
- Dry after finishing the process.
Step 4: Put half a lemon, the juice of the other half, and some water into a microwave-friendly bowl.
- Put the bowl into your microwave.
- Let it emit steam.
- Wait for the inside to cool for 5-10 minutes.
- Get it out and wipe it inside your microwave.
This will also refresh your microwave oven.
External Cleaning Methods
- Use vinegar mixed with water to wipe the exterior or use a sponge wet with dish soap and water for scrubbing all the external sides of your microwave including the control panel and handle.
- If your microwave oven has stainless-steel parts or it is a stainless-steel microwave, you can rub alcohol over it to make it shiny and remove fingerprints.
- Check the manual’s guide for your microwave to know whether it has a filtering system. If the filter is removable and washable, soak it in warm soapy water and scrub it then wash with water and dry it.
Final Words
We here focus most on cleaning with natural ingredients, except for soap. So, we avoided mentioning commercial cleansers as some of them result in fumes and contain strong chemicals that may stay longer in your microwave oven and move to your food.
If you want to use them, choose the fume-free and safe products and open the door for 2 hours after cleaning.
Make it a habit to wipe your microwave oven after every usage which will make it look good between deep cleaning cycles.
There is also a recommendation to use suitable lids when heating food or drinks to reduce the mess as much as possible.