
How to Fix a Sagging Fence: Points to Be Noted!
Oh, are you being disgusted about your sagging fence? If yes, then find the best ways here to fix it out.

In the deepest recesses of your brain was this image of a tidy, fenced-up space that you wanted around your yard and you had poured your heart into fixing and installing that fence of your dreams! But, never had you imagined that the sturdy, old thing would give you such troubles! So, it is important that you have knowledge of how to fix a sagging fence.
Each one of you fence-ers can easily relate to the nuisance of tending to your pesky fence, and the problems that it poses every 6-8 months. Especially, they occur on those days when it’s pouring cats and dogs! But do not fret! For we have you covered!
You may observe a number of issues related to your fence. So, we have tried to identify each type of issue and provide solutions to them. Let’s move to the points on how to fix a sagging fence.
Ultimate Solutions on How to Fix a Sagging Fence
1. The Problem: Rusty Rails
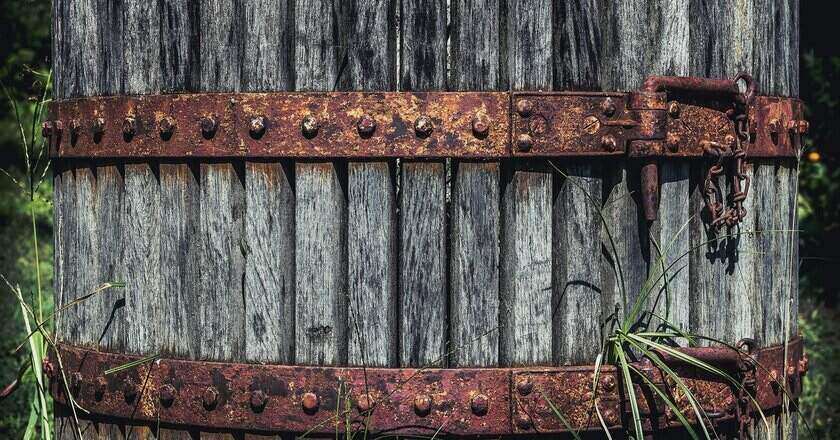
Image Credit: David Bartus
The Fix: Rail Replacements of the Right Kind
Rusting or broken rails are the commonest culprits of sagging fenced and replacing them does the trick for you. The rails need to be frequently monitored for any faults and, ideally, replaced before the sag sets in.
The strength of the rails needs to be proportionate to the size of the fence. It is needless to say that the quality must be top-notch as they will be performing most of the weight-bearing jobs.
A common problem while replacing the rails is the distance of their placement. Keep in mind that increased gaps would consequently set in an earlier sag. Hence, they need to be placed apart such that they can fully bear the weight and tension of a sturdy fence.
2. The Problem: Equipment Giving Way

Image Credit: Thibault Luycx
The Fix: Replace the Hardware
Ramblings of weather and dust will always leave their harsh effect on the wood and the connecting hardware. Be sure to replace them before the wear and tear make its marks. It is one of the finest ways of how to fix a sagging fence.
Once you’ve noticed a moulding dark patch on the wood, do not wait for it to become apparent or wait until the entire board molds! Carefully remove that piece of wood and replace it gently so as to keep the entire line intact.
You may also read: How to Clean Walls with Flat Paint
The same goes for the screws, hinges, connecting wires, or any other hardware holding the structure together.
If your DIY is on point, you already know the sizes of the new equipment needed. But just in case you’re clueless, don’t worry! Your local hardware shop has it covered. Take a few pictures and show them for advice. They’ll be your perfect guide on the size and kind of replacements required.
3. The Problem: The Adverse Weather’s Toll & The Base Giving Way
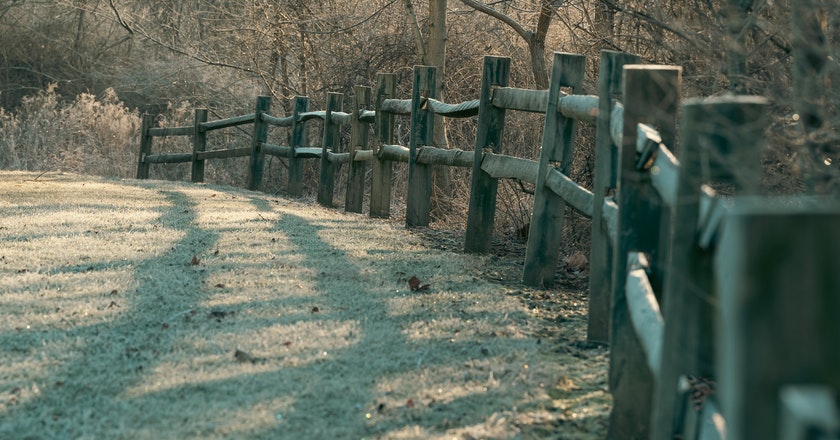
Image Credit: Chris
The Fix: Even & Fill the Base to Fix the Sagging Fence
If the ground beneath has deficient soil or is giving way, the lapse of strength won’t bear the weight of the heavy fence. The best fix is to use quick-setting concrete. Once placed, pour water over it and wait for it to be set before re-positing the fence.
These are the points to consider on how to fix a sagging fence. If you find them less effective for your fence, expected to work well though, then you have alternatives here.
The Final & Tested Way of How to Fix a Sagging Fence
The Anti-Sag Kits
When all else fails, the anti-sag kits can always save the day! They are cheap, handy, and easily available. Usually, anti-sag kits work by providing pressure on one side to automatically stabilize the other end with their anti-force.
They come equipped with two to four corner braces, a turnbuckle, cable, and fittings that balance the fence tension and provide it enough support to maintain the weight.
Once You Get the Kits, Follow the Steps below to Fix the Sag
- First, ensure that the top corner bracket goes on the inside of the frame of the gate with the help of a screwdriver.
- Secure the cable through the 2nd corner bracket and fix it on the other end to the bottom corner of the gate.
- Take the turnbuckle and attach the hook end to the top corner bracket.
- Take the cable and string it through the eyelet of the turnbuckle, while taking care not to tighten it too much.
- Use the cable to tighten it.
- Tighten the turnbuckle enough to allow it to lift the gate up to the appropriate height.
- Remove supports under the gate and ensure that the new setup has done the job. And voila! The gate’s as good as new and the sag’s disappeared!
Some Safety Considerations of How to Fix a Sagging Fence!!

Remember that fencing requires the use of sharp equipment and the lifting of considerably heavy equipment. Don’t forget to wear gloves and some protective equipment considering the possible consequences.
You should always keep an aide with you while working on such laborious tasks.
Read More: Effective Ways to Get Rid of Gnats
Your comprehension would expand your horizons if you began by first watching short DIY videos before you embarked on the arduous task. So, it’s best to take a few minutes and understand the right way to fix the sagging fence.
Frequent monitoring to identify a problem as soon as it sprouts its head and snipping it in the bud would save both your energy and time in the long run. It would not only make the fence last longer but would prevent the surrounding structure from being damaged too.
Conclusion
The best way of how to fix a sagging fence would have been to choose the right quality and dimensions, to begin with! Then, the use of protective & weather-resistant paints, sturdy wood, and high-quality hardware guarantees a long run to the fence.
Without further ado, let’s go nail that fence back!